 |
Bread making for beginners
| by Maria from Bulgaria |
|
|
Are you longing for real thick bread with a hard crusty crust, instead of the supermarket sweetened sponge? Yes, it’s quite hard to find and it’s usually quite expensive… But, you can make it yourself at home cheaply and easily! Let me share my experience and hope this convinces you to try. We don't have a bread maker, just a combined oven with microwave ? standard Japanese machine. Even though I come from a bread-eating country I've never made bread, or any dough-thing, before coming to Japan - I always considered it too complicated for my cooking level. My mother never did anything of this sort either. It's only my grandma who would sometimes do pastry. This is just to tell you from what humble bread-making background I come. Another note among these lines - in our house my boyfriend is responsible for the bread making and he has absolutely no previous relevant experience whatsoever. Initially we were taught by a (male) friend of mine who makes his bread in a small toaster oven..
Now, hope this convinces you - making bread is VERY easy. Me too, I didn’t believe at first, but it is. OK, he's the procedure, simple as children's game.
3. Leave the dough to rest and rise at a warm place. How? 3.1. If you have an oven, they usually have a function of 30-40 degrees warming. This is exactly for dough rising. Just switch this function on, select 40 min or 1 hour (I go for 1 hour). Take a dish at least 2 times bigger than the dough volume (as it will rise!) and cover the bottom with some oil (any oil, just to prevent the dough from sticking). Place the dough in the dish, put it in the oven and wait for it to rise. 3.2. If you don’t have an oven (just like the friend who taught us). Take a deep pan or casserole with a cover, at least 2 times bigger than the volume of the dough. Cover the bottom with s little oil (just to prevent the dough from sticking). Place the dough in the pan/casserole, place the cover. Heat the pan/casserole on the gas cooker ? strong flame for a short time ? you aim to heat the walls of the container, not to fry the dough. Then cover the pan/casserole with few layers of towels/little blankets and leave it. In summer one heating is enough (and in hot days no heating is needed), but in winter the pan should be checked often and if the walls get cold should be reheated repeatedly. 4. The dough has risen. It gets at least double. 4.1 If you’ve been rising it in an oven in a baking dish and want to make a big loaf, just turn to the oven function 210 degrees Celsius 40 min (give it 50 min the first time and see how it goes for your oven) switch it on and wait for the dough to get even bigger and eventually to become golden/slightly brown on the top. 4.2. If you’ve been rising it in a casserole and want to make a big loaf in an oven (that’s what we’ve been doing for half an year until we accidentally discovered our oven HAS a rising function), just take it out of the pan and place it in a baking dish, or give it a form (round, cylinder) and place it on a baking tray, stick it into the oven and bake for 40-50 min at 210 degrees Celsius. 4.3. If you want to make little rolls instead of big loaf (and that’s what you can do in a toaster oven). Take the dough out of whatever you’ve been rising it into. Place it on the table/kitchen counter covered with some flour. Tear with hands little peaces and make balls. Make them as equal size as possible. Cover the baking tray with some oil and place your rolls on it. Bake at high temperature for probably 30 min, but check them often as it will all depend on your toaster oven. They should rise and get slightly brown on the top.
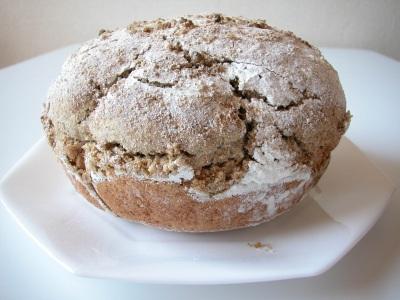
5. Ready! You have 1 kg of bread! Take your bread out of the oven, cover
with clean towel and leave to cool down. With big loafs we’ve noticed that cutting it while it’s still hot is no good ? the inside is still too moist from the steam and gets a bit gluey. But
if left to cool it’s just perfect.
Notes: 1. anyway. You might want to try though ? after the initial rising, work the dough a little and give it a form/make little balls. Leave this final form in its final baking container to rise for 1 hour again, before baking it. 2. This recipe is the simplest ? only flour, yeast and water. You can add some olive oil into the initial mixture, or some nuts/raisins/corn/ anything while you’re working the dough (not at the very beginning, but when you get a formed dough). 3. This dough makes decent pizza too. Tried and approved J After rising separate the dough in small pieces and flatten them, put any topping you like and bake. 4. How much does it all cost? 1 kg of white flour is between 100 and 200 yen.. 500g of bran (graham) is around 300 yen, a big pack of yeast (that keeps us going for months) is around 500 yen.
|